Aftershoot Review | Using AI to cull wedding photos
If there’s one thing the post-lockdown wedding boom of 2021 has taught me, it’s the value of an efficient workflow. I booked out my wedding calendar this year, with events every weekend from May through November; faced with 10+ weddings more than I intended, I knew I would need to implement workflow changes to keep up with my full schedule while maintaining a suitable work/life balance during what is arguably the busiest wedding season our industry has seen in a long time.
I’m a busy dad with a two-year-old daughter and another baby on the way, so the last thing I want to do is be chained to my computer screen any longer than I have to. Running a successful photography business requires you, the business owner, to juggle multiple roles — from marketing, to client service, shooting the wedding, all elements of post-production, and more. I first learned of AfterShoot through a Facebook ad when the program was still in beta mode. Curious about a program that promised me “freedom from thousands of small decisions” and time back in my schedule to repurpose for other more profit-generating business activities (hey there, marketing and networking!) I downloaded the beta version and was pleasantly surprised by the results it delivered.
20+ weddings, 15 engagement sessions, and 5 editorials later, I’m a Pro user of AfterShoot. Read on for my full AfterShoot review, including an overview of how the app works, as well as the best settings for AfterShoot, my recommended AI culling workflow, tips and tricks, and a helpful pros and cons comparison to help you decide if AfterShoot is right for you.
Affiliate Disclosure: This post contains affiliate links. If you click through and make a purchase, I will receive a small commission at no extra charge to you. All opinions are my own.
What is AfterShoot?
The team at AfterShoot make the bold claim their program is the “fastest and easiest way to automatically select, rate and find your best photos,” and after putting it to the test across multiple weddings, engagement sessions, and editorials so far this season, I would have to agree. In fact, I’ve enjoyed using it so much, Aftershoot has completely replaced Photo Mechanic in my day-to-day workflow.
Designed to speed up the ingest portion of every busy photographer’s workflow, AfterShoot uses a proprietary AI algorithm trained on more than 5 million images to select the best photographs from your session. (More on how that works in just a minute.) Aftershoot is a standalone culling program that supports both Windows and Mac platforms (including the new M1 chip). The program integrates with Lightroom and Capture One for editing, as well as Windows Explorer and the Apple Finder for export and backup of your RAW files. Aftershoot can import and cull all leading RAW image formats as well as JPG and PNG files.
How does Aftershoot work?
Creating albums
The AfterShoot culling process begins by creating an album, the home for all RAW files from a specific session or wedding. If you create separate Lightroom catalogs for each job (and you should, by the way!), this step should feel very familiar. You can easily create a new album from the app’s home screen:
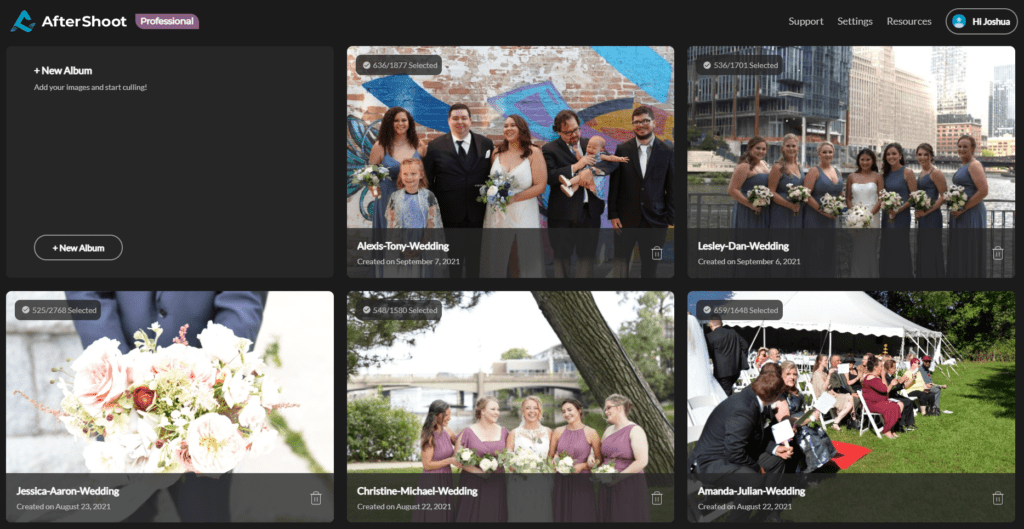
After you’ve created your album, you can simply drag and drop RAW folders to ingest RAW previews prior to culling. Be sure your name your album before your start importing — if you don’t, it will inherit the name of the first folder you drop in. (Helpful if part of your post production process includes importing cards from a client’s shoot into a subdirectory titled “RAW” as I do.
How quickly can Aftershoot cull images?
Once you’ve imported images from all of your cameras and cards, simply hit the “Start Culling” button to begin the process. You’ll be presented with a pre-cull dialogue box, where you can adjust the program’s default culling filters or completely bypass them and cull manually if you really wanted to. The app begins working its magic and provides you with an estimated time to completion along the way, and when the job is done, you’ll receive a chipper email letting you know your shoot has been culled in the event you stepped away from your computer.
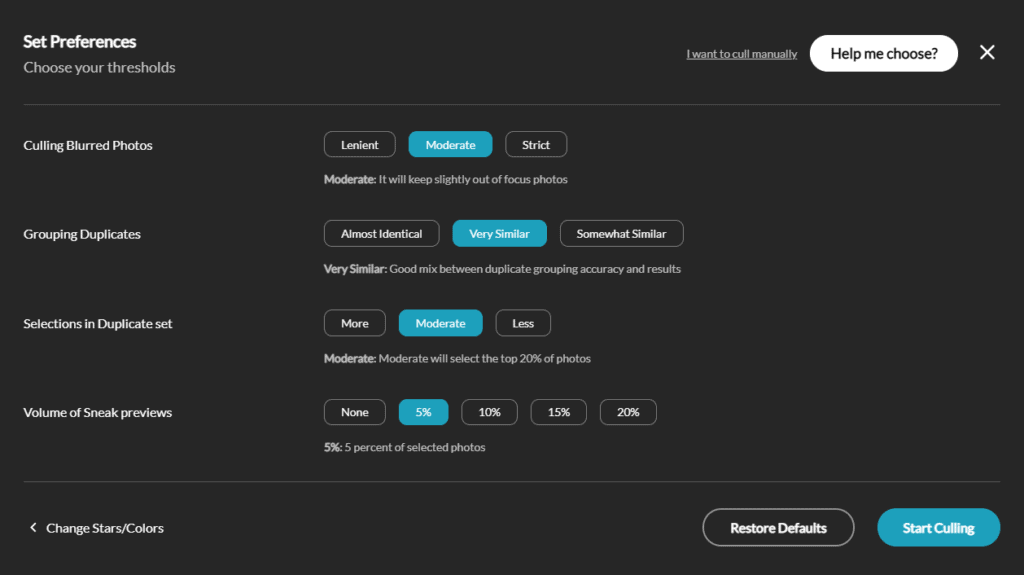
While culling speed may vary based on your system’s hardware, I’ve enjoyed how quickly Aftershoot can cull images. On my Windows 10 system running 16 GB of RAM, a Ryzen 2700x processor, and a GTX 1660 Ti GPU, the app can completely cull an engagement session (400-800 RAWs) in 5-10 minutes. For weddings, I’m typically importing 2,000 images shot on three or more cameras; these jobs are completed as fast as 20 minutes later. The largest job I’ve culled was about 8,000 images and the program took about an hour to do its thing. The best part? I was free to do other things during the time the program spent culling!
Once the algorithm has processed your images, you’ll be able to review them for accuracy and make any desired manual overrides (easily applied using numeric keypad shortcuts to change rating and color labels) before exporting your images for additional processing or editing. The app will intelligently rate your images with stars and colored labels. By the default settings, images flagged as Green and 5 Stars will be grouped as your selections. Depending on your choices in the culling dialogue box, AfterShoot might also select a portion of your images (5-20%) as “Sneak Previews,” which are flagged as 4 Stars/Blue.
The app will use several other categories to group duplicates, blurred images, and closed eyes (star ratings 1-3). While I have found the 5 Star/Green selections to be quite reliable for my work, these “rejected” categories are important to pay attention to from time to time, depending how you like to shoot. (Best practices on that under “My AI Culling Workflow” below.)
Exporting images from AfterShoot
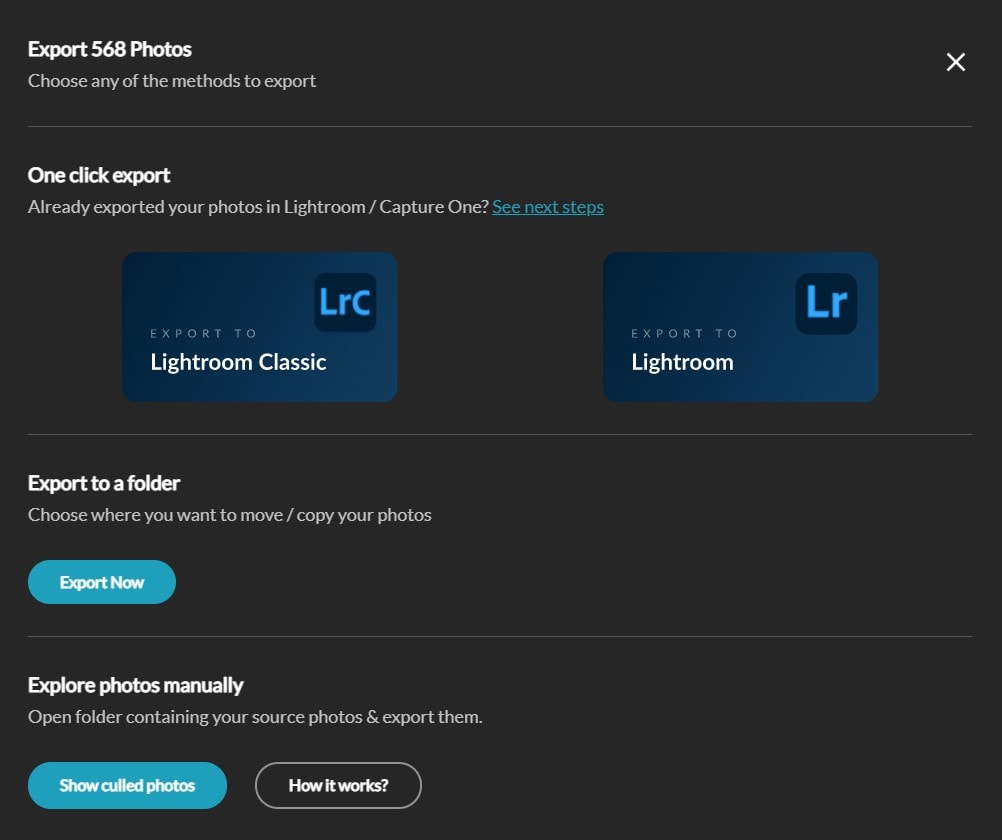
Once you’re satisfied with AfterShoot’s image selections, it’s time to export! The app is thoughtfully designed to include options to directly export your images to your preferred editing platform. Lightroom and Capture One are both supported.
If you would prefer to edit in another program (such as Photoshop) or do any additional processing or converting outside of an editing app, AfterShoot also allows you easily export your selected images to a folder of your choice.
The best settings for culling with AfterShoot | My AI Culling Workflow
Ingest
My AfterShoot culling workflow begins with ingesting images from all of the cards I and my second photographer used at the previous day’s wedding. If you’re working on a PC or Mac with only one card slot, I recommend you drop the RAWs from all of your cards into a temporary “RAW Dump” folder so AfterShoot can cull everything at once. (This will save you time reviewing and combining culled folders later.) For ingest phase, my folder structure looks something like this:

Files from each of my team’s cameras get their own “dump” folder. Once I’ve culled in AfterShoot, I export only the selected RAWs to a “Selected” folder (AfterShoot will automatically create this for you). Following final delivery of the album and client gallery, I come back and delete the dump files to save space on my archive hard drives.
Cull
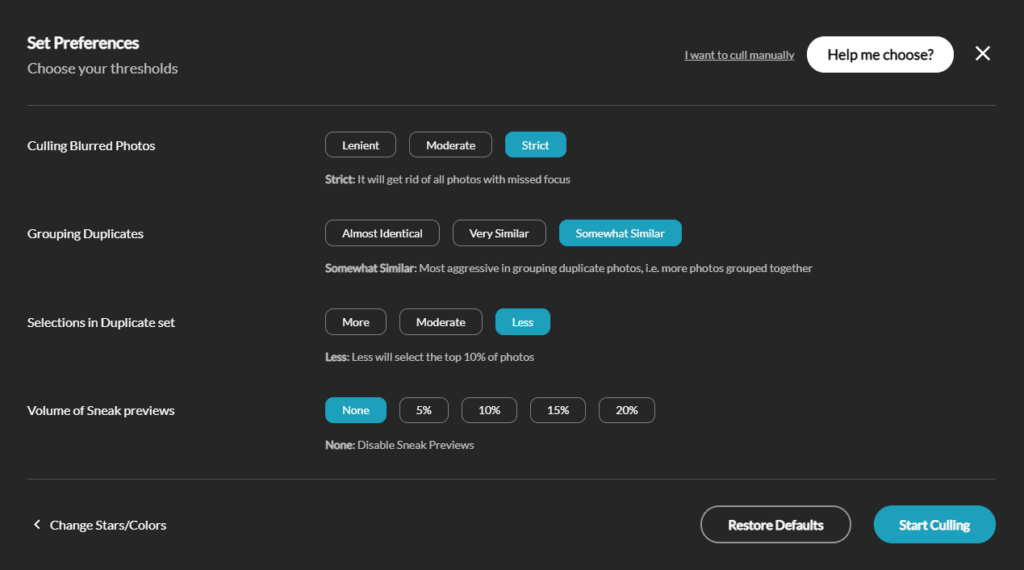
I’m not a computer programmer, so I can’t speak to the coding and algorithms behind AfterShoot, but I can share my honest impressions of how the program works when it comes to culling images. The program looks for similar image groups and attempts to select the best images from your shoot by filtering out the out of focus and blinking images. My goal with AfterShoot is to have to do as little manual culling as possible, so I’ve configured my settings as follows:
Culling blurred photos
I’ve found the app does a great job removing photos with camera shake and/or motion blur. To save myself time manually removing selected images later, I set this filter as strict as possible.
Grouping duplicate photos
My goal for every wedding is to cull down to 500-800 deliverable images. I’ve found setting the this filter to the strictest setting helps the app consistently arrive at 700-1,000selected images that I can quickly review and modify.
Selections in duplicate set
AfterShoot will group together similar photos in duplicate sets, which you can review to confirm that it grabbed the best ones. (I’ve found it usually does!) I set this to “less” so I have smaller groups of duplicates to review when I manually check the cull results for quality and accuracy.
Volume of sneak previews
Sneak previews are selected based on a flat percentage of your total album size. So, of you’re culling a folder of 2,000 RAW images, you’d receive 100 suggested sneak previews in your cull results. Personally, that’s more previews than I want to deliver to my clients, so I just disable this option and cherry pick a few images myself.
Reviewing
As smart as AfterShoot’s AI is, the program does not make your culling process a completely hands-off experience. Over the past few months, I’ve noticed a pattern of folks grousing in various photography Facebook groups that “AfterShoot doesn’t select the right images.” I disagree, and I think this comes to a fundamental misunderstanding of how the program works. At a functional level, the app is scanning the pixels of your RAW files to find unique images. It’s a quantitative process; for best results, we as the artist behind the camera must still apply some measure of qualitative analysis.
The program is quite good at identifying photos of bridal details, family formals (gone are my days of zooming in on previews to count open eyeballs!), and bride/groom/wedding party portraits. When folks are moving faster (i.e., walking into the ceremony, grand entrance to the reception, wigging out on the dance floor), the app has a tendency to select more images from these parts of the day — the reason for this is simple: because your subjects are moving more quickly, the AI recognizes fewer similarities between frames and creates proportionally fewer duplicate groups.
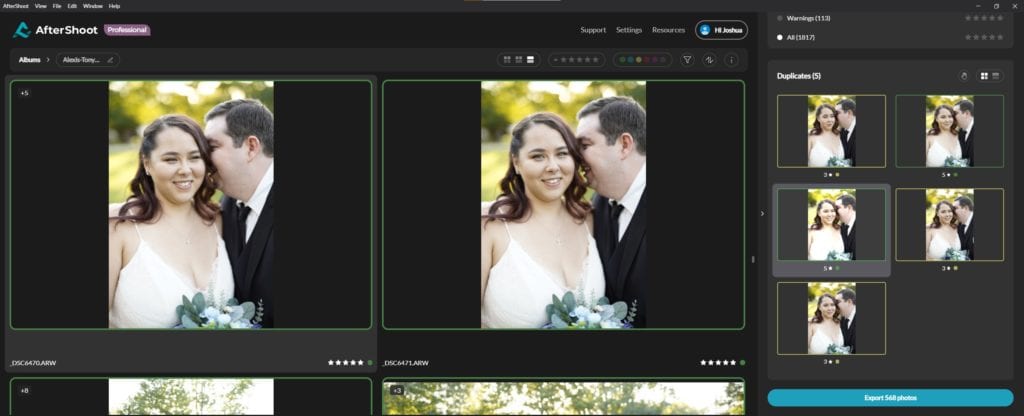
After the AI has processed the album, I typically spend 10-20 minutes rejecting unneeded selected images to arrive at the final image count I want to deliver in the client gallery. Most of the images I reject are extras from the dance floor.
Export
I don’t allow AfterShoot to automatically import my images to Lightroom for editing because I take the additional step of converting the keepers to DNG before generating a Lightroom catalog to send to my editors. If you don’t need to convert, rename or do any other batch file processing, then by all means — export directly to Lightroom or Capture One. Helpful dialogue boxes will walk you through the process each time.
Reasons to use AfterShoot
Time saved
This one’s simple. Do you want to spend 1-2 hours culling a full wedding by hand, or do you want to let an app get you 90% of the way there, with only a few manual tweaks left for you to complete? While the algorithms aren’t completely perfect yet, this app has allowed me to speed up my culling process compared to Photo Mechanic by a wide margin.
Interface
The GUI (graphical user interface) is thoughtfully designed with modern aesthetics while still being easy to navigate and use. A limited palette of keyboard shortcuts makes it easy to develop proficiency as you cull, review, and export images.
Integrations
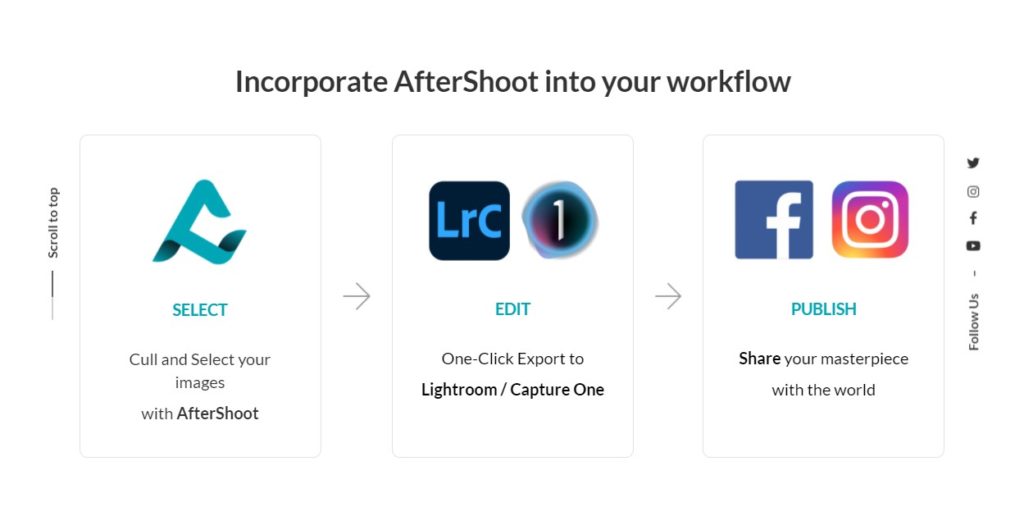
AfterShoot is available for both Mac and PC, and it plays nice with Lightroom and Capture One, so it’s easy to integrate into your existing workflow, no matter what platform you’re on.
Price
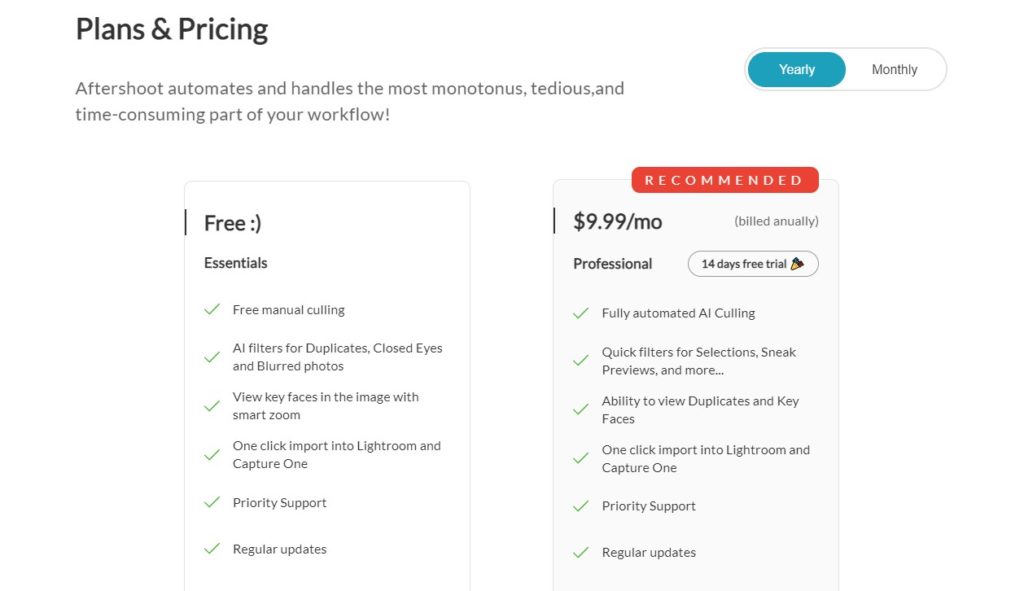
For the equivalent of one Starbucks run per month, you can automate the bulk of your culling process.
Support
In addition to regular software updates by the dev team, the app is chock full of help options, with integrated access to video tutorials, links to a community support Facebook group, and the option to live chat a support agent from within the AfterShoot interface itself.

Negatives of AfterShoot
File renaming
If renaming your files from your camera’s default numerical setting to something more relevant to your clients’ event is a priority for you, then this issue might be a turn off. Currently, the program does not support file renaming. See the official help files for a workaround.
PC resources
I’ve noticed AfterShoot does put a significant load on my computer’s resources when culling a large job. If want to multitask with other resource-hungry programs (I’m looking at you, Chrome, Lightroom, and Photoshop), this might not be the best solution for you.
Recurring costs
The pro version of Aftershoot is subscription-based, and there’s no option to by a version of the program outright.
Too many selections
To make the most of AfterShoot, you need to have a solid posing, directing, and shooting process at the event. If you frequently shoot on burst mode trying to capture every moment, you’ll find yourself importing large jobs, and the AI will select large swaths of duplicate photos thanks to your shutter-happy fingers. That said, if you can be intentional about what you shoot, this program can be a powerful ally, helping you sift the best of the best from the near misses.
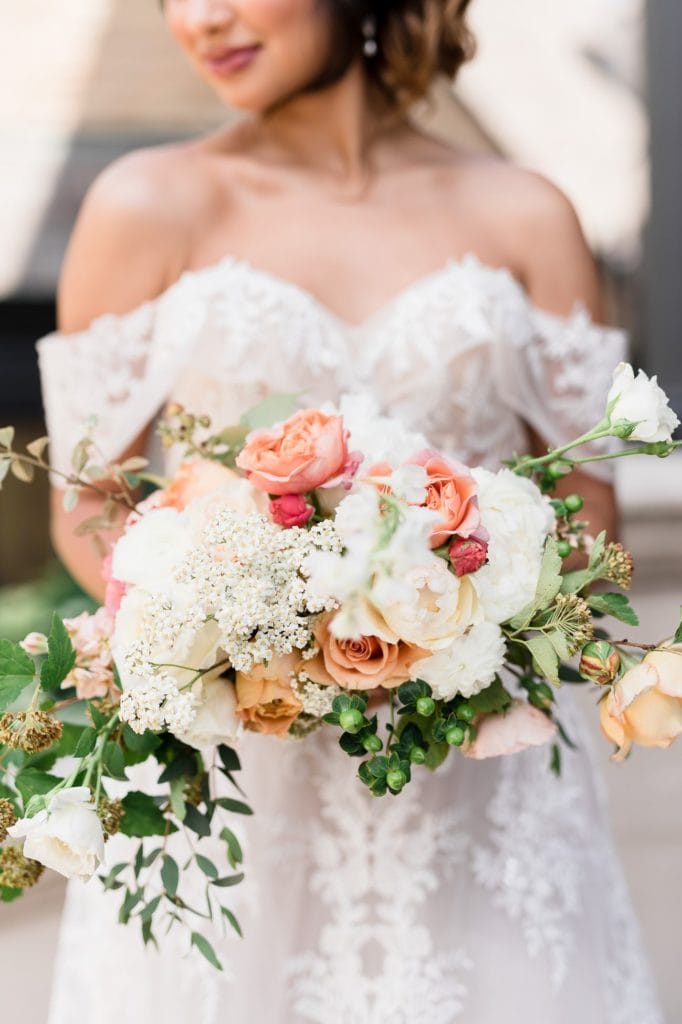
Intentional soft focus
If you shoot in a fine art-inspired aesthetic from me, you might find the app rejecting deliberately out of focus or soft images. AfterShoot seems to seek out in-focus faces above all else. For example, the app rejected this image of a bride holding her bouquet, currently featured on my homepage:
Aftershoot Q&A — what it doesn’t do!
AfterShoot Cost: Is it free?
AfterShoot does provide a “free” option with some “AI-lite” filters for blurry and closed-eye images, but the most powerful features and time-saving filters are locked behind a paywall.
Can you use Aftershoot inside Lightroom?
AfterShoot is a standalone application. While you can directly export images to Lightroom for editing, it does not function as an integrated Lightroom plugin.
Does this tool work on mobile?
At this time, AfterShoot is not available for Android or iOS devices.
Conclusion
See a real wedding culled by AI
Not convinced? Want to see what a wedding culled by the AfterShoot AI looks like? Check out this complete wedding culled by AfterShoot.
Try AfterShoot
If culling always feels like the least creative portion of your wedding workflow, then you should give AfterShoot a try. If you take nothing else away from my Aftershoot review, remember this: the value you get from AfterShoot comes in part from what you put in. Create photographs with thought and intention, and the app will help you sort them for editing in less time than before.
I have culled over 40,000 images using AfterShoot, and according to the in-app calculator, I’ve saved about 7 days of my life compared to culling completely by hand. I you’d like to try Aftershoot, you can download the free version or subscribe as a pro for 10% off. (My thank you for sticking through to the end of this lengthy review!)
Have questions about integrating AfterShoot into your workflow or want to suggest another wedding photography tool for me to review? Get in touch here.
The views and opinions in this AfterShoot review are my own and were not solicited or induced by AfterShoot, Inc.

